
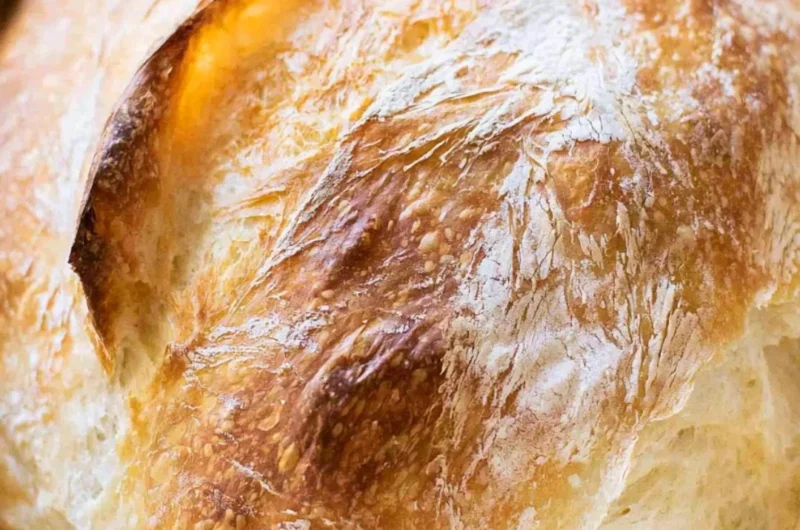
No-Fail Sourdough Bread: A Cozy Delight for Your Kitchen
There’s something truly magical about the aroma of freshly baked bread wafting through your home. It wraps around you like a warm hug, evoking memories of sitting at your grandmother’s kitchen table, the golden crust crackling beneath your fingertips. This No-Fail Sourdough Bread recipe is an homage to those cherished moments and will become a staple in your cozy kitchen. It’s the perfect blend of simplicity and nostalgia, making it an ideal choice for both seasoned bakers and novices alike. Each slice offers a comforting chew and a delightful tang, providing the perfect foundation for everything from butter to homemade jams. Trust me—this is one you’ll definitely want to pin for later!
Why You’ll Love This Recipe
- Simple and Straightforward: Perfect for beginner bakers, this recipe is accessible yet rewarding, making it an easy weeknight baking project.
- No-Fail Promise: With straightforward steps, you’ll achieve that rustic, artisan loaf without the typical sourdough stress.
- Crowd-Pleasing Aroma: The baking time fills your house with a warm, inviting scent that will leave your family or guests eagerly awaiting that first slice.
- Healthy and Wholesome: Made with high-quality ingredients, this loaf is a nutritious addition to any meal.
- Versatile and Customizable: Enjoy it as a base for sandwiches, toast, or simply with a smear of butter—perfect for any meal of the day!
Ingredients You’ll Need for No-Fail Sourdough Bread
- 500g all-purpose flour
- 350g water
- 10g salt
- 100g sourdough starter
Let’s Make It Together
- In a large bowl, mix together the flour, water, salt, and sourdough starter until a shaggy dough forms.
- Cover the bowl and let it rest for 30 minutes. This resting time, or “autolyse,” allows the flour to absorb the water, improving texture.
- Knead the dough for about 10 minutes until it’s smooth and elastic. You’ll love how it transforms in your hands!
- Place the dough in a lightly greased bowl, cover it, and let it rise at room temperature for 4-6 hours until doubled in size. This is when the magic happens—watch your dough puff up!
- Shape the dough into a round loaf and place it on a floured surface. Cover and let it rest for another 30 minutes, allowing the gluten to relax.
- Preheat your oven to 450°F (230°C) with a Dutch oven inside. This will create that beautiful crust!
- Carefully transfer the dough to the hot Dutch oven, cover it, and bake for 30 minutes. Listen for that satisfying sizzle as it hits the hot surface.
- Remove the lid and bake for an additional 15-20 minutes until golden brown. Enjoy the anticipation as the crust develops into a deep, rustic brown.
- Let the bread cool on a wire rack before slicing. Allowing it to cool is essential for achieving that perfect texture!
Fun Ways to Customize It
- Herb-Infused Loaf: Add fresh rosemary or thyme to the dough for a fragrant, zesty touch that pairs beautifully with olive oil.
- Cheese and Chive: Fold in sharp cheddar and fresh chives for a rich, savory treat that’s perfect for snacking or impressing guests.
- Sweet Cinnamon Raisin: Sprinkle in cinnamon and plump raisins for a delightful breakfast option that feels indulgent yet wholesome.
- Seed Topping: Before baking, sprinkle the top with sesame or poppy seeds for added crunch and visual appeal.
Chef Emma’s Helpful Tips
- Timing is Key: If you can’t bake the bread right after it rises, you can refrigerate your dough in a covered bowl for up to 12 hours. This can deepen the flavor.
- Hydration Matter: Each flour absorbs water differently; feel free to adjust the water slightly if your dough feels too dry or too sticky.
- Steam for Glory: If you don’t have a Dutch oven, you can create steam in your oven by placing a baking tray filled with water on the bottom rack while baking.
- Storage Secrets: Store any leftover bread wrapped in a kitchen towel for a day or two for the best texture, or freeze the slices for later use.
What’s Inside – Nutrition Breakdown
- Serving Size: 1 slice
- Calories: 150
- Carbohydrates: 30g
- Sugars: 0g
- Fat: 1g
- Protein: 5g
- Sodium: 250mg
Frequently Asked Questions
Can I make this ahead?
Absolutely! You can prepare your dough the night before and refrigerate it overnight for an even deeper flavor.
Can I use different ingredients?
Feel free to experiment with different flours, such as whole wheat or spelt, adjusting the water content as needed.
How do I store leftovers?
Wrap in a cloth or in a paper bag at room temperature for up to 2 days, or freeze for longer storage.
How long does it last?
Freshly baked sourdough is best enjoyed within a week, but freezing it can keep it delicious for up to a month!
Wrapping It Up
There’s something truly special about baking your own bread at home. Each loaf tells a story—not just of the ingredients but also of the love and care you put into every step. This No-Fail Sourdough Bread recipe is perfect for those cozy weekend mornings or as a staple to accompany your family dinners. Don’t forget to save this recipe to your baking inspirations board so it’s ready whenever you need a comforting treat! Happy baking!

No-Fail Sourdough Bread
- Total Time: 90 minutes
- Yield: 12 servings 1x
- Diet: Vegetarian
Description
A cozy and simple sourdough bread recipe that delivers a rustic, artisan loaf without the stress.
Ingredients
- 500g all-purpose flour
- 350g water
- 10g salt
- 100g sourdough starter
Instructions
- Mix together the flour, water, salt, and sourdough starter until a shaggy dough forms.
- Cover the bowl and let it rest for 30 minutes.
- Knead the dough for about 10 minutes until it’s smooth and elastic.
- Place the dough in a lightly greased bowl, cover it, and let it rise at room temperature for 4-6 hours until doubled in size.
- Shape the dough into a round loaf and place it on a floured surface.
- Preheat your oven to 450°F (230°C) with a Dutch oven inside.
- Carefully transfer the dough to the hot Dutch oven, cover it, and bake for 30 minutes.
- Remove the lid and bake for an additional 15-20 minutes until golden brown.
- Let the bread cool on a wire rack before slicing.
Notes
You can customize the flavor by adding herbs, cheese, or sweet ingredients. Store leftover bread wrapped in a kitchen towel or freeze for later.
- Prep Time: 40 minutes
- Cook Time: 50 minutes
- Category: Baking
- Method: Baking
- Cuisine: Bread
Nutrition
- Serving Size: 1 slice
- Calories: 150
- Sugar: 0g
- Sodium: 250mg
- Fat: 1g
- Saturated Fat: 0g
- Unsaturated Fat: 0g
- Trans Fat: 0g
- Carbohydrates: 30g
- Fiber: 1g
- Protein: 5g
- Cholesterol: 0mg