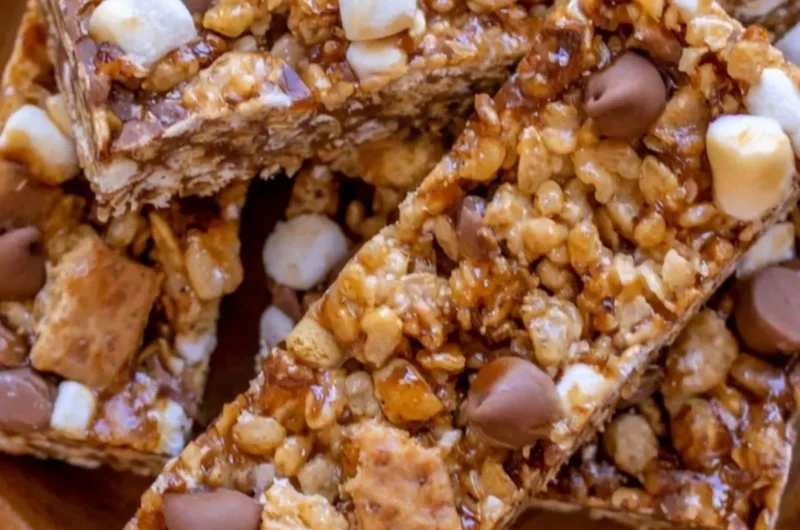
Homemade Granola Bars: A Cozy Snack Delight
In the hustle and bustle of everyday life, there’s something beautifully nostalgic about a homemade granola bar. When I was a child, my mom would whip up a batch before school mornings, filling our home with the warm scents of honey and toasted oats. The golden, sun-kissed bars were an essential part of our busy mornings, providing a comforting blend of chewy and crispy goodness. Now, as I stand in my own kitchen creating these delightful treats, each bite takes me back to those warm, loving moments.
These Homemade Granola Bars are not just easy snacks; they’re a delicious way to recapture that cozy feeling, perfect for busy weeknights or lazy weekends. Each bar combines simple, wholesome ingredients to create a satisfying bite that will remind you of cherished memories. This is a recipe you’ll definitely want to pin for later!
Why You’ll Love This Recipe
- Quick and Easy: This no-bake recipe is perfect for busy families looking for a nutritious snack.
- Customizable: Mix and match nuts, fruits, and flavors to make it your own!
- Crowd-Pleasing: These bars are perfect for kids and adults alike, making them an ideal snack for parties.
- Nutritious and Satisfying: Packed with oats and nuts, they offer sustaining energy to get you through your day.
- Make Ahead: Prepare a batch on the weekend and have snacks ready for the week ahead!
What You’ll Need
Gather these simple ingredients to make your Homemade Granola Bars:
- 2 cups rolled oats
- 1 cup nuts (almonds, walnuts, or peanuts)
- 1/2 cup honey or maple syrup
- 1/4 cup peanut butter or almond butter
- 1/2 cup chocolate chips
- 1/2 cup mini marshmallows
- 1/2 teaspoon vanilla extract
- A pinch of salt
Let’s Make It Together
- In a large bowl, mix together the rolled oats, nuts, and a pinch of salt until well combined.
- In a small saucepan over low heat, combine the honey and peanut butter, stirring until melted and smooth. Add in the vanilla extract for that extra layer of flavor.
- Pour the warm honey mixture over the oat mixture and mix well until everything is fully combined.
- Allow the mixture to cool slightly before folding in the chocolate chips and mini marshmallows, so they don’t melt too much.
- Line a baking pan with parchment paper, then press the mixture firmly into the pan to create an even layer.
- Refrigerate the mixture for at least 2 hours until set—this is the hardest part, but trust me, it’s worth the wait!
- Once set, cut into bars and enjoy the chewy, crunchy goodness!
Delicious Variations to Try
- Fruity Twist: Add a handful of dried fruits like cranberries, apricots, or raisins for a sweet zing.
- Nutty Delight: Swap in your favorite nuts or seeds like chia seeds or sunflowers for a different texture.
- Spicy Kick: Sprinkle in some cinnamon or nutmeg for a warm, rich flavor that’s perfect for chilly evenings.
- Indulgent Treat: Drizzle melted dark chocolate on top after cutting for a decadent finish.
Chef Emma’s Helpful Tips
- Make-Ahead Magic: These bars can be made up to a week in advance. Just store them in an airtight container in the refrigerator!
- Slicing Tips: Use a sharp knife and warm it slightly under hot water for cleaner cuts.
- Ingredient Swaps: Can’t use honey? Maple syrup or agave nectar works beautifully too!
- Storage: To keep these bars fresh, wrap them individually in cling film or parchment paper before storing.
What’s Inside – Nutrition Breakdown
- Serving Size: 1 bar
- Calories: 190
- Carbs: 25g
- Sugar: 10g
- Fat: 8g
- Protein: 4g
- Sodium: 30mg
Frequently Asked Questions
-
Can I make this ahead?
Absolutely! These granola bars can be made ahead of time and stored in an airtight container for up to a week. -
Can I use different ingredients?
Yes! Feel free to experiment with different nuts, seeds, or sweeteners based on your taste preferences or dietary needs. -
How do I store leftovers?
Store them in an airtight container in the refrigerator or at room temperature for shorter durations. -
How long does it last?
These granola bars will stay fresh for about one week if stored properly.
A Cozy Closing Note
These Homemade Granola Bars are more than just a snack; they are a warm embrace wrapped in oats and love, perfect for those moments when you need a little comfort food. Whether you’re enjoying them on a hike, as an after-school treat, or as a mid-afternoon pick-me-up, they’ll bring a smile to your face just like they did for me many years ago.
Save this Homemade Granola Bars recipe to your Pinterest board so it’s ready when you need a cozy treat! Enjoy the tenderness and crunch, and savor each delicious bite!
Homemade Granola Bars
- Total Time: 135 minutes
- Yield: 10 servings 1x
- Diet: Vegetarian
Description
A nostalgic and delicious no-bake recipe for homemade granola bars, perfect for busy families and customizable with your favorite ingredients.
Ingredients
- 2 cups rolled oats
- 1 cup nuts (almonds, walnuts, or peanuts)
- 1/2 cup honey or maple syrup
- 1/4 cup peanut butter or almond butter
- 1/2 cup chocolate chips
- 1/2 cup mini marshmallows
- 1/2 teaspoon vanilla extract
- A pinch of salt
Instructions
- Mix together the rolled oats, nuts, and a pinch of salt until well combined.
- Combine the honey and peanut butter in a small saucepan over low heat, stirring until melted and smooth. Add in the vanilla extract.
- Pour the warm honey mixture over the oat mixture and mix well until everything is fully combined.
- Cool the mixture slightly before folding in the chocolate chips and mini marshmallows.
- Line a baking pan with parchment paper, then press the mixture firmly into the pan to create an even layer.
- Refrigerate the mixture for at least 120 minutes until set.
- Cut into bars and enjoy the chewy, crunchy goodness!
Notes
These bars can be made up to a week in advance. Use a sharp knife for cleaner cuts.
- Prep Time: 15 minutes
- Cook Time: 5 minutes
- Category: Snack
- Method: No-Bake
- Cuisine: American
Nutrition
- Serving Size: 1 bar
- Calories: 190
- Sugar: 10g
- Sodium: 30mg
- Fat: 8g
- Saturated Fat: 1.5g
- Unsaturated Fat: 6.5g
- Trans Fat: 0g
- Carbohydrates: 25g
- Fiber: 2g
- Protein: 4g
- Cholesterol: 0mg